

What is the issue?
For some unknown reason, the Canon Maxify range of printers (using PGI-1500 and PGI-2500 ink cartridges) have no way of letting you release and remove cartridges unless they've run out of ink.
Usually this can be done on most printers by simply opening the lid, however, the Maxify range greet you with a rather blunt message of 'Close Lid'.
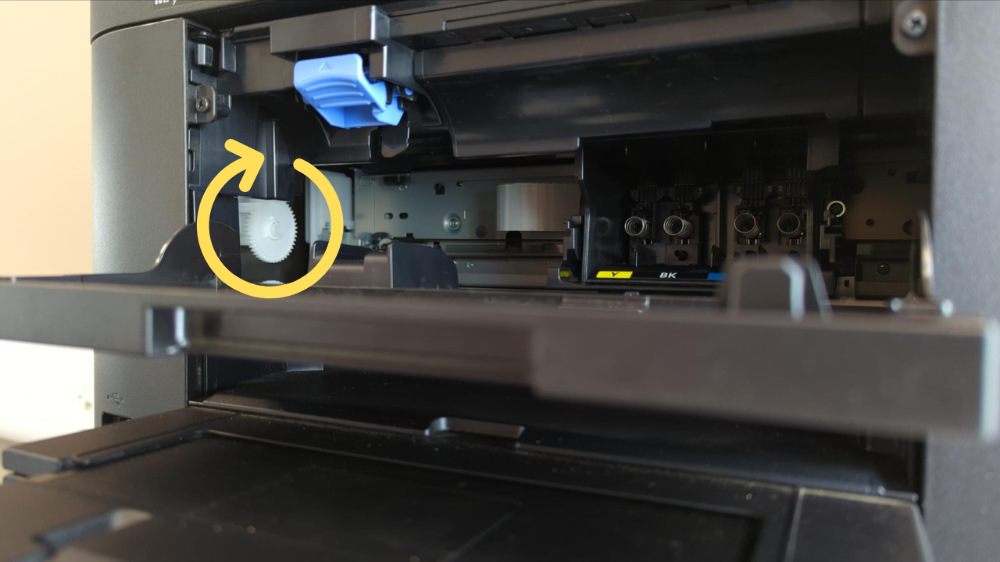
Luckily, there is a workaround that isn't too tricky to perform. We've created a quick tutorial video showing how to do this. As per the picture below, it involves manually rotating the cartridge release cog at the left hand side, inside the printer.
Firstly, turn the printer on and open the lid. Wait until the printhead begins to move across the carriage before pulling the power or switching off at the plug. This will enable you to move the printhead freely without risk of damage.
Locate the cog in the picture above and rotate it clockwise until you hear a click. This will have activated the blue cartridge release button to remove one cartridge. Simply move the required cartridge into place to remove and press the release button to do so.
Continue this for each additional cartridge you wish to remove, before connecting power and switching the printer back on. The printer should then prompt for missing cartridges to be installed.