

A common source of frustration from our customers relates to experiencing poor print quality, caused by a blockage in the printhead.
Many printers include a tools or maintenance menu for such occasions, featuring both a diagnostic nozzle print check or print quality report and a head clean and/or deep head clean option. Ideally, use the 'nozzle check' print out first to help diagnose which cartridge colours might not be printing fully on to the paper, before performing a head clean (or deep head clean if the results are particularly poor) to help push through any internal dried ink, ink clots or even air bubbles that might be in the system. Follow this up with another nozzle check to see if improvements have been made.
Some internal blockages are very stubborn and the in-built tools can struggle to make any improvement to print quality. With most printers this is problematic, as you've got no other tools at your disposal (Some head cleaning cartridges may be an option if available for your printer, but this is not usually the case).
Luckily, many Canon printers feature a removable printhead to perform manual cleaning. Removing a printhead can also solve some cartridge recognition issues, as we'll explain later.
The steps outlined below relate to printers using the PGI-550/CLI-551 and PGI-570/CLI-571 cartridges. Previous Canon ranges may have an alternative way of removing the printhead, usually via a Grey lever at the right hand side.
Tools
- Air Duster/Compressed Air
- Syringe
- Kitchen Roll or Soft Cloth
- Isopropyl Alcohol
Step 1
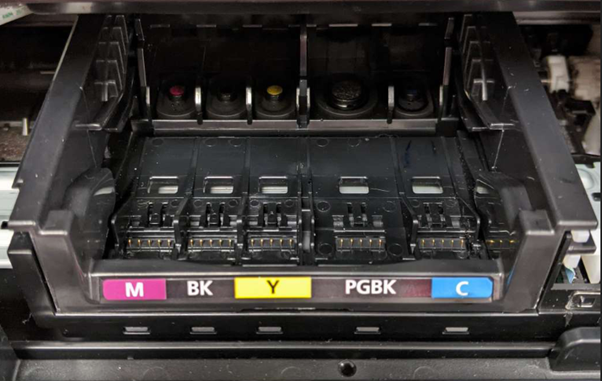
Turn the printer on and wait until you hear the internal parts moving backwards and forwards. Pull the power at this point and open the lid. You should then be able to move the printhead manually to a position for removal, without pulling against the printers natural internal electronics. The print head or internals should not be moved while the printer is powered on.
Remove all cartridges and pull the bar towards you that has the cartridge colour labels on it. This will unlock the printhead.
Step 2
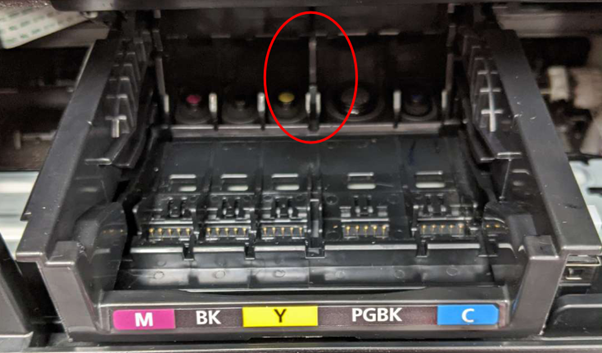
The bar will pull forwards as below and you can then pull the printhead towards you by gripping the central plastic 'spine' circled below.
Step 3
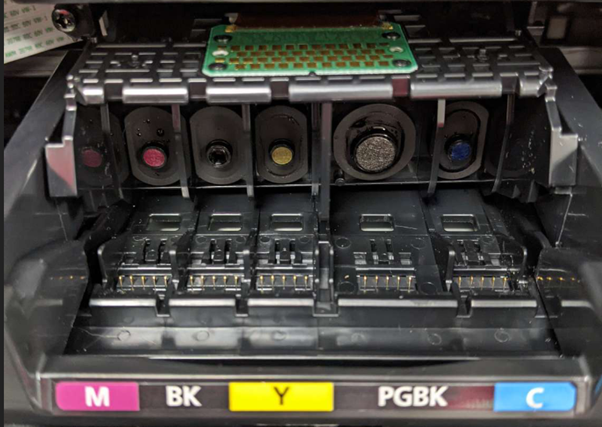
The printhead will tilt forward by 90 degrees as below, and can then be removed for inspection.
Step 4 - Cartridge Recognition Issues
Check the metal contacts on the back of the printhead for debris, paper dust or ink as they can all prevent a correct contact when installed in the printer.
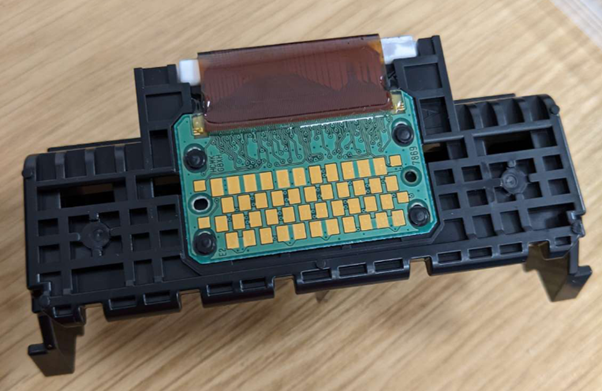
It's also worth blowing compressed air at the contacts situated behind where the printhead sits in the printer.

Step 5 - Deep Printhead Blockage
Place the printhead on absorbent kitchen roll and ideally with a syringe, drop isopropyl alcohol on to each nozzle where you suspect there is a blockage. It's often worth cleaning all while the printhead is removed from the printer.
The Isopropyl alcohol will help to break up any hardened ink inside the printhead. You can also run the printhead nozzles under a running tap until the ink runs clear from the bottom. Air Duster/Compressed Air can be used to help push through any clots of ink and also to speed up the internal drying process
The printhead should be ideally left overnight to fully dry on kitchen roll to absorb any residue left inside and the compressed air can be used again to double check it's all dry before installing back in the printer
Step 6 - Re-install
Whether you've removed the printhead to solve recognition issues or print quality issues, it should be re-install as it was removed. Insert at 90 degrees with the nozzles facing towards you before letting the printhead fall backwards into place. Once in place, simply push the bar back to lock the printhead in place.
The cartridges can then be re-installed and the printer plugged in. I'd recommend performing a nozzle check and head clean to make sure everything is coming through as it should be, then you should hopefully be good to go!